Widget | Fantastic Theme for MIUI 12 With Minimal Look
Hey MIUI users,
As we all aware that xiaomi is one of the leading smartphone brand and it's has been possible due affordable price and it's customizable User interface. The MIUI is best customizable android skin available out in smartphone industry. It enables user to Customise stuff like wallpaper, lockscreen quick toggles and even we can customize a particular app UI using their modules. somes of the changes you can explore from menu.
Today I am providing you best miui theme which comes with elegant look. The icons are beautiful and wallpaper makes your device look defferent and beautiful I hope you will like it for sure.
Widget
Designer :- Zishan Khan
Size :- 9.3Mb
Compatibility :- MIUI 12
Region :- India
Note :- Restart your Phone After Appling Theme
Highlighted Features
➥ Shortcut Features on Lockscreen
➥ Charging Animation
➥ Beautiful wallpaper
➥ Control center themed
➥ old quick toggles redesigned
➥ Change in Notification Bar
➥ Beautiful icons Pack
➥ Unique Lockscreen
➥ Settings Changed
➥ Dialler Pad Changed
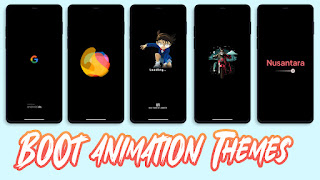
Theme Screenshots
Download from theme store
Download mtz
Thank you for visiting to miuithemes.store we hope you will find interesting themes here. you can visit to us for dialy new amazing Themes
How to Download This Theme Through Theme store
- Click on "Get on Theme store " Button given above
- Now, open with Window will appear please select Theme store
- In case you don't see theme store app please go through Mi browser (stock browser)
- Then, click on download Button and ofter download completion apply it and enjoy
How to install Third party Theme on miui 11
- Download the mtz theme file from the above link.
- Download MIUI Theme editor from Google Play Store - MIUI Theme editor.
- Open the MIUI Theme Editor app.
- Now select the Browse option and locate the Third Party Theme mtz file.
- Select the Start option.
- Select the Next option.
- Now select the Finish option.
- A message will appear to install that theme. Select the Install option.
- The theme has been successfully installed. Now, go to the Theme Store and you will see that the third party theme you installed is here. Click on it and Apply it.
How to Install Third Party Themes on Xiaomi MIUI phones
Permanent Solution(Won’t go to default Theme)
After installing open the App.
Enable Show hidden globally & recursively
Now open Settings Menu > Additional settings > Full-screen display and select Buttons.
Now again Go to Settings > Additional settings > Button shortcuts > Close current app > select Long press the Back button
Now Go to Themes App and start downloading any theme.
After the download has finished and you see importing theme Long Press Back Button as soon as possible and you will get the message Force closed Themes.
Go to MiXplorer > (Go to)Browse your theme file > Open it > And Copy Everything Except description.xml File.
Now Go to MIUI > theme > .download > you will an mtz file.
Open that mtz file > delete everything except description.xml file.
Paste the files you copied from your third party theme.
Open Themes App & Apply the Third Party Theme and done.
How to apply third party theme using Theme swap
Note: Your theme will be applied but it will not show applied in your theme center.
Open it and click on the + plus button at the bottom.
Select the file which you want to install (.mtz file). Click on Hamburger Menu on the top left corner for File Manager.
Tap on OK. And wait till the file is unpacking.
Click on the Theme Name and Select Pack Theme and Apply.
Then it will show a prompt Theme Packed. Apply Now. Click Yes to apply theme.
And Boom! Your Third Party Theme has been Installed.